All that I'm after is a LIFE full of laughter, as long as I'm laughing with YOU!

Oct 27, 2010

Flower fun *tutorial*

I love making flowers and hair bows for my girls.

When they were young they never left the house without their hair being perfect. As they aged they cared less about their hair & even less about those flowers and bows.


Finally things have come full circle and they of course care VERY MUCH about their hair (at 12 & 16) and hair accessories have come back into fashion! Bows, clips, headbands, etc....

This is a new style of "flower" I learned recently in a class from the very talented Adair.

You begin with 8 large circles (I used scalloped circles on these pictures) you will also need 8 of the smaller circles and a layer of lace or tulle.

Taking one stack of circles at a time cut into them from on edge to the center (just a straight slit). Beginning at one edge you accordion fold the circle until it become a wedge shape - folding approx. 7 times, making 8 layers. I use hot glue to secure each until I am ready to attach them. Complete this step with both the large and small circles.

Once you have all your pieces folded and secured. You will begin to form a circle with the large circles gluing 2 together, then a 3rd, and as you add the 4th...you should have 1/2 a circle. They don't (and often won't) line up perfect, no worries....that will be covered up.

I then use a drop of hot glue to attach the layer or tulle/lace and set it aside as I build the smaller circle in the same way. Again building a circle and gluing it down to the lace/tulle layer.

I finish mine off with buttons, stones, knots and any other little items I find that match and look cute. My girls loves them and I've made quite a few for their friends too. I just glue alligator clips to the backs, but you can also add bar pins to wear them on a lapel or bag.

Oct 26, 2010

prepare yourself

It's not Halloween quite yet, but these pictures are a bit scary!
I've had a few questions about my weight loss ticker on my blog.

Yes...I did lose 100lbs... Through Diet and Exercise only.
I started my lifestyle change in May 2009.
May 2010 I hit 100lbs. lost.

I have played with some pounds up and down over the summer,
but I'm still wearing the same clothes I purchased at my lowest.

My friends and I just started up a 3rd round of biggest loser, it will go thru the holidays and end mid January 2011.

Every little bit helps with motivation!


Quick and Easy mini album

This weekend I finished up this little album of out summer water park fun. Each section 2 pages/4 front and backs is made from a single sheet of cardstock.
I lined each flat page with a coordinating printed paper (this was BoBunny line Sun Kissed) using different edge punches to make each unique. I did triangles on each pocket page, also adding edge punching or corner punches. I used small tags to journal on and placed each in a pocket and attaches buttons or ribbons to the tag hole for easy access.

Making the pages are pretty simple...

Take a full sheet of 12 x 12 paper and score it at 6inches on each side. This will resulting in 4 - 6x6 scored squares.

Second cut one scored line from the edge to the center of the four squares (see dotted line)

Next using a ruler, score from the corner of the new cut line, to the corner diagonally from it, this will form 2 triangles on each of the flaps.

Alone that scored triangle line, crease the cardstock, forming a triangle. Using your tape runner or adhesive of your choice, glue the flap down to make that triangle double thick.

Next you will form the pockets. On flap #1 add adhesive along the triangle/pocket edge that will lay closest to the center scored line, that will be the fold in the page. Keep the adhesive as close to the edge as possible so you will have plenty room to use that pocket. On flap #2 you will do the exact same thing, but this time folding the flap backwards to the other side. After gluing it down, you will have one pocket on each side. This will be 2 pages, each side consisting of 1 pocket, 1 flat side.

The blue represents your pockets/flaps. But this is as if you can see thru the cardstock to see each sides pocket.

Oct 25, 2010

Recovering from my weekend

Who knew Retreating could be so tiring. I guess I should have allowed for more sleep time. It's very hard for me to stop when I'm on a roll but I paid for that last night. My sweet husband let me sleep in this morning till 10.


I made a small banner using the "lost and found" line by my minds eye. It turned out pretty cute. This shows it under construction and the glossy accents drying.

Here is the finished product:

Oct 23, 2010

My littel get-away!


I got the opportunity to attend a scrapbooking retreat this weekend and jumped at the chance. Last night Lynn and I were up till 5am...(I was back up at 9am). Our time was super productive last night, checkout Lynn's cute lil pumpkin!


I've been surrounded by banners lately....I think I'm being dubbed the "banner gal"!


I'm looking forward to showing you all my finished projects this coming week. Have a great weekend and stay dry in all this rain!


Oct 21, 2010

The 31st is here!


Well, it's here at my home... but it will be arriving before you know it on the calendar too!

I saw a cute idea recently and made it my own, using those paper mache type numbers. Most all craft stores carry the letters, I have only found the numbers at Hobby Lobby.

After painting the numbers and a small wooden base black, I just added in a few spooky accents. You could use a wide variety of those small party favor type items you find at all the discount stores. The raven, butterfly and hologram sticker were all found at Micheal's. Add a few cobwebs and a light layer of silver glimmer mist and you have a fun center piece. Mine will be on the food table at my daughter's upcoming Halloween party!
Have a great day!!

Oct 19, 2010

Banner Tutorial


After my recent post of banners, I had a few requests for more details...so here we go!
These banners were made via swaps with other scrappers, but could easily be done but one person with lots of creative juices flowing {lol}
The tags were sheets of 8.5 x 11 cardstock cut in half to form 2 - 4.25 x 5.5 Tags. I notched my corners 1inch in and 1inch down.
You create one tag for each letter in the word or phrase you want to spell on your banner. These were Happy Halloween - so 14 letters, plus one to start the banner, one to separate Happy from Halloween and one to end the banner. That made for 16 tags in all...thus 16 people signed up for spots in this banner swap. Each of those 16 people chose from the list of letters & dividers needed and created a tag and repeated it 15 times.

I've created several of this type banners on my own, but it does take awhile longer and I tend to stick to shorter words, as it can be challenging to come up with that many decorative ideas in one session. If you start early and have some real time to put into it, you'll have a wonderful banner you can use year after year.
I store these by folding them accordion style and placing them in gallon Ziploc bags.

Oct 17, 2010

Banners

I love all kinds of banners around my home. Halloween is always a fun occasion to decorate to me. I have multiple banners and seems to keep adding each year.


This banner is 3 years old. I made it via a swap
on 2peas in a bucket. I created the "W". I turned out to be a great piece and has held up well.

I also complete this banner in a swap too. This one I did the "Y". It's hung in a standard doorway from the entry way. It's always fun to see what everyone will do to decorate there piece.

This is my newest banner. It is made from fabric. Each member was to create an assigned letter from the "Happy Halloween". I made 14 - N's and 14 - A's. I got 2 complete sets of the letters as I was making one to share with a sweet friend.

The letter were to be made from Halloween fabric, a layer of batting and a contrasting color for the back sides. The each turned out wonderful. I'm almost out of doorways to make any more banners, but there is always room across the mantel!

Oct 16, 2010

I {heart} pumpkins!


I've been really into pumpkins this season. I tend to buy and make more each year adding to my collection. I find pumpkins are great items that plays double duty when it comes to decorating!

They are perfect for October as Halloween approaches, but can be left out to carry your decor through Thanksgiving. These are a few of my favorites..old & new!

Oct 12, 2010

Getting it done


This past weekend was busy but ever so productive. I went to a late night crop Friday and completed a project that I have long been waiting to do. I went to Canton a couple weeks ago (a local flea/craft type market) where I purchased three unfinished crosses. I painted the edges, covered 2 with paper that coordinates with my home and covered one with embossed metal. Once each was complete, they were gorilla glued together and will be hung in my living room very soon.

It's always a suprise


That is one consistent thing about scrapstachers at the Little Blue House. This week we were to bring 12 - 1x12 strips of papers. One set Halloween and one set Holiday or fall. It turned out to be great fun.
I look forward to the next class!

Oct 9, 2010

Today is the BIG DAY

I have been marking off the days on the calendar in anticipation of today for 2 wonderful reasons....

#1: I finally get to create the astonishing Alice in Wonderland Mini album at the Scrapper's Boutique taught be the talented Adair!

#2: I will be attending the Carrie Underwood concert at the AAC. I've been looking forward to this since attending the Adam Lambert concert several weeks ago with my "concert buddy"!

Oct 8, 2010

Busy Weekend


This weekend is going to be day busy!
I will be cropping late into the night with a fabulous group of women.
God has truly recently blessed me with a circle of friends who lift me up and steer clear of the drama factor. I somewhat feel like Jonah in that God wanted me to be in a certain place in my life and I've fought that for years, but through a whale of another kinda, I am right where I need to be for me.
Wishing you all a wonderful weekend!

Oct 7, 2010

Party Time!

My youngest daughter is excited to be hosting her 1st ever Halloween party!! She plans to invite some boys too, so it should make for an interesting evening of spooky fun.


I used the fun Bo Bunny Halloween line "Whoo-ligans". I'd been looking for just about any excuse to use this line of paper. She was thrilled with my invitation design and they are all tired, enveloped, addressed and ready to be delivered to her friends! I guess she's a bit excited :)

Oct 5, 2010

A change from the routine


Last week was a very busy week...Homecoming week for my teenage daugher's school. Monday was the parade (that her daddy kindly pulled her student concil float in). The following days were a bit of a blur involving baking 2 batches of brownies, 2 batches of chocolate chip cookies, 2 batches peanut butter cookies, mum building, t-shirt decorating, alumni cattering, football game, homecoming dance and SO MUCH MORE!

Sep 30, 2010

Happy B-day to anyone!

In my recent card making I've enjoyed alot of the current paper lines. With all truth be told I have to say this line of "B-day Bash" by Imaginisce is my most recent favorite. I love making birthday cards, and this line is so versatile. I've made adult cards, kids cards, men, women's and everything in between with this line. Seldom does it come along that you can create so many different items for a broad span of ages and sexes.


If you can find it still on the shelves of your local scrapbook store, I'd suggest you grab what you can and add it to your stash (you have one...we all do).

For my local readers: I know our local store Scrapper's Boutique has some still in stock!

Sep 29, 2010

Fun is in the Cards!


...and family too for that matter! This was a fun little card to make. Using both stamps and fun printed paper....2 of my favorite things. Throw in a little ribbon to hold the tag and a dimensional pop dot for the family sentiment and you have yourself a card that could be used for multiple occasions.
If you like it and are interested in purchasing it, you can find it for sale in my Etsy store.

Sep 28, 2010

Fun Project


Last evening I attended a class called "scrapstashers" at The Little Blue House. The intent of the class it to make great items using things you already have in your scrapbooking stash! While this class has been around for quite some time, this was my first time to attend and I can honestly say I was NOT disappointed!

They provided the tree portion of the project for us (I actually purchased several more to use making gifts). Then we each cut out papers using the leaves that were cutout as patterns. Needless to say each of the finished projects looked different but they were all amazing! The cost of this class is only $5 and I think this was the best $5.00 I've spend creating a new decor item for my home ever.
If you are local I strongly recommend you make time in your schedule to attend one of these classes!

Sep 22, 2010

Witching Season is near!

I'm soooo ready for fall and cooler temperatures. There is no better way to get that fall feeling than Friday night high school football & decorating for Halloween! This week I spend an afternoon crafting a new decoration to add to our yearly stash of spooky gear. No one will be too frightened by this fun project involving 3 frames, some patterned paper and LOT of glitter!


Everyone loved this little project and even my kids noticed it on the mantle after school. Hope everyone is having as much fun as I am preparing for fright night!

Sep 17, 2010

My new love

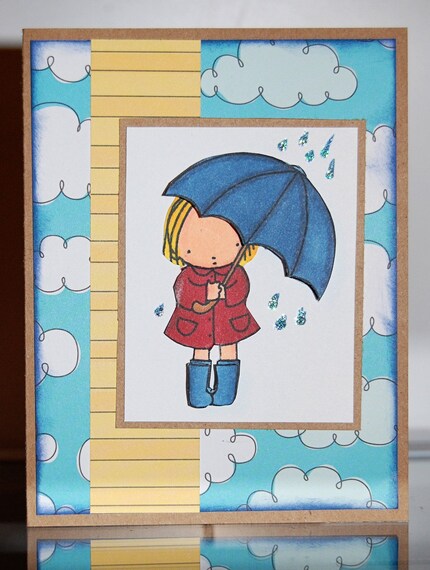
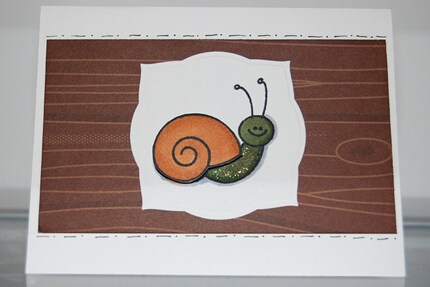
I've said for while a long time I did not need to get into a new addiction, but I could no longer ignore those beautiful Copic pens! I took an instructional class Tuesday at Scraper's Boutique and fell in love. While they are a bit of an investment, you can get buy with just 2 of each color family when starting out. I made my first cards using them yesterday.

Sep 15, 2010

Boo to you!

I'm actually ahead of the holiday for once this Halloween! I'm excited to start working on teacher treats today. Most parents stop sending gifts after elementary, but I send them thru High School. Those teacher deal with so much drama from the kids...I think they need a little boost more than ever.
Here are a couple cards I worked on yesterday at the Scrappers Boutique!